ShrinkWrap creates a watertight mesh around open or closed meshes, NURBS geometry, SubD, and point clouds.
ShrinkWrap is ideal for creating:
- Meshes for 3D printing.
- A solid union mesh from multiple objects.
- A solid mesh from 3D scan data fragments.
- Meshes without internal self-intersections.
- Offset meshes for shelling.
- Meshes from point clouds when reverse engineering.
- Valid closed meshes from broken or often hard-to-repair geometry.
ShrinkWrap in Action
Try It
- Download Rhino 8 Evaluation for Windows or Mac.
- Download and open the ShrinkWrap-Demo.3dm model. This is a 3D scan of a shoe last used in shoemaking. Notice the major gaps and broken, uneven mesh geometry. You can fix that with ShrinkWrap.
- Select all the objects in ShrinkWrap-Demo.3dm model (run
-_SelAll). - Run the
ShrinkWrapcommand (the button can also be found in the Mesh Tools toolbar). The ShrinkWrap dialog appears: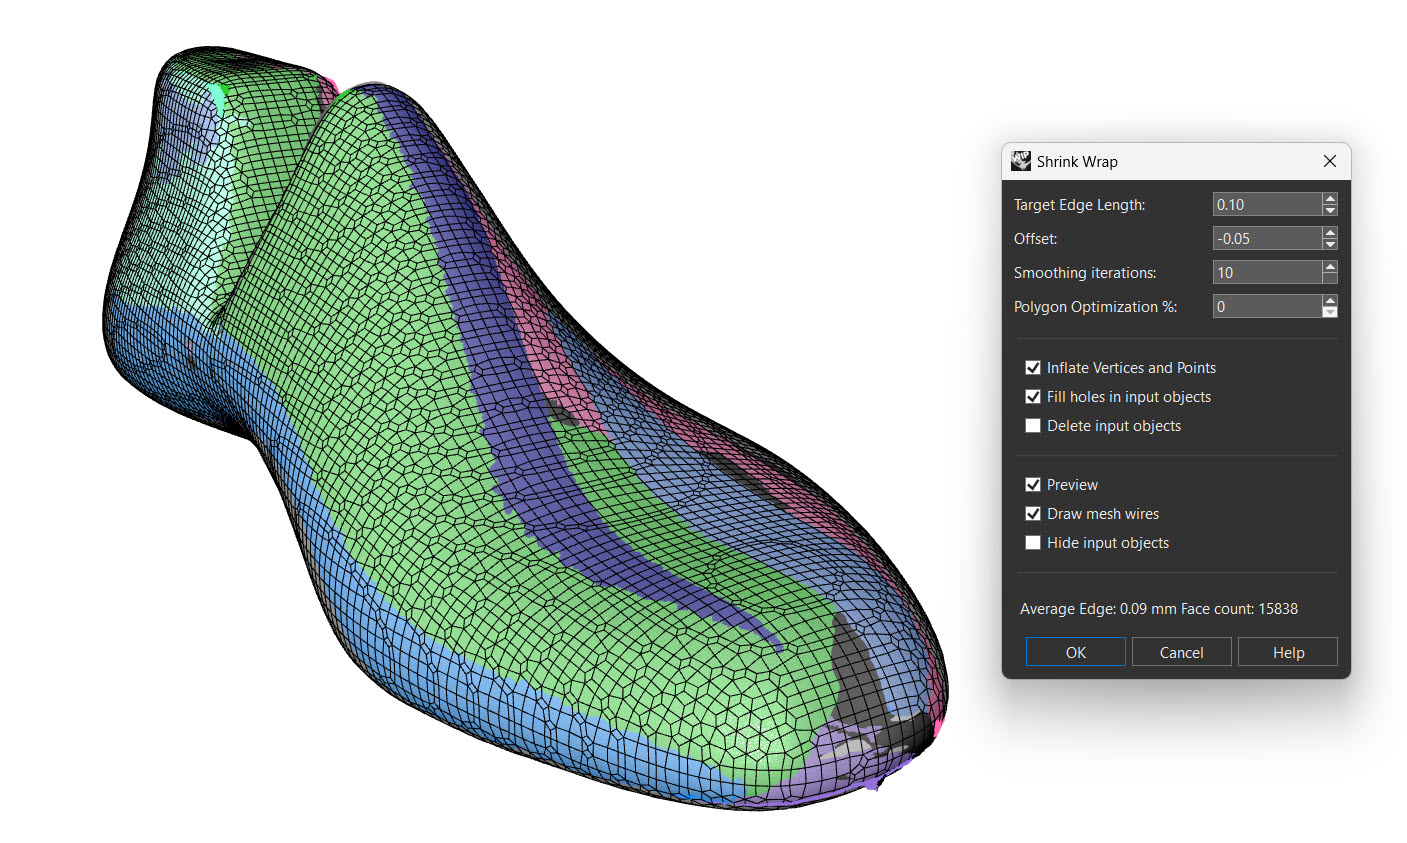
- Set the Target Edge Length to `0.10'. This option effects the density of the resulting mesh.
- Set the Offset value to
-0.05. Offset pulls the results of inflated points back to the original. - Set the Smoothing iterations to
10. A larger value will smooth out lumps and pits where the large hole in the toe was. - Check the Inflate Vertices and Points option. This converts all non-mesh objects to meshes and then samples each new vertex location as a point cloud to construct the new mesh.
- Click the OK button. In a few moments, you should have a closed, watertight mesh.
- Ask questions and give feedback on the Discourse Forum.
